This guide explains how to configure the Company settings for your White Label platform. It covers how to set your app name, company website, and brand logos, which are used across the platform interface, sign-in pages, and system emails.
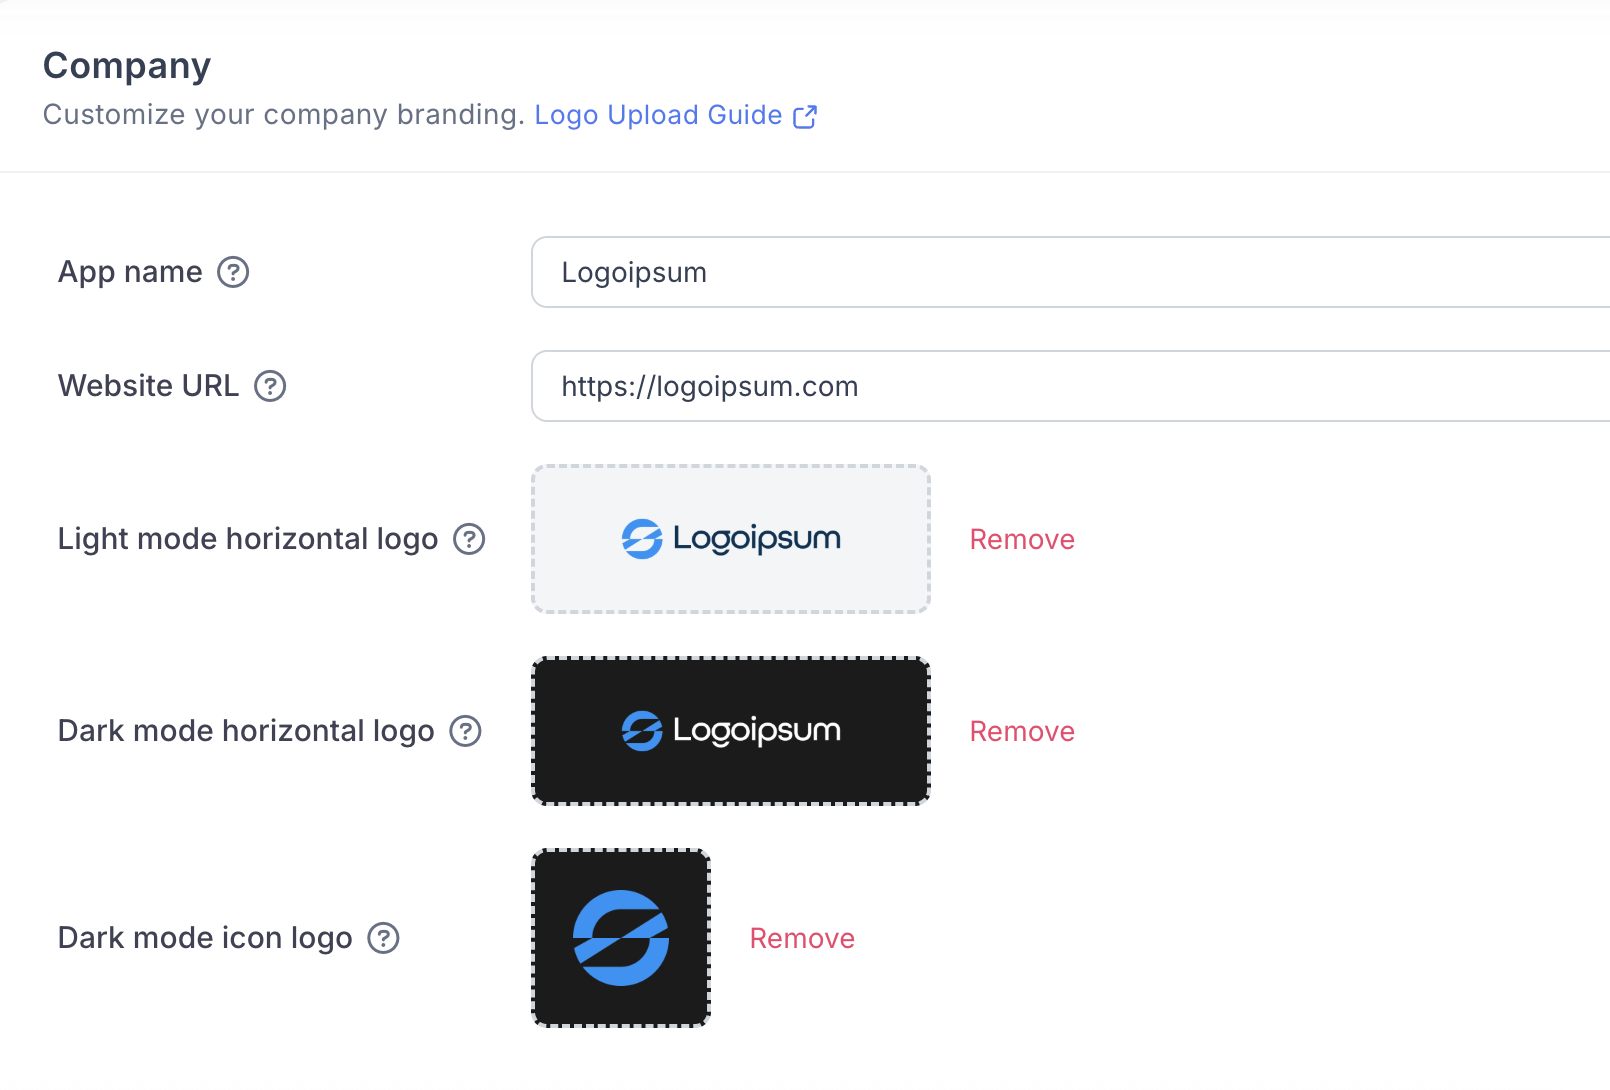
The App Name is the name of your white-label application. This is how users will recognise the platform as they navigate it and receive emails from it.
The app name appears throughout the system UI and in all automated emails.
Choose a name that represents your brand clearly, as if you were naming a standalone app.
This does not need to include “Swft Connect” or similar — it should reflect your product.
Examples:
Acme Connect
BluePeak Digital Cards
Atlas Business Cards
Nova Networking
The Website URL should be your main company website, not the URL of your white-label platform.
This is typically your primary business or agency website.
For example, if you are a marketing agency, this should link to your agency site.
Do not enter your white-label app domain here.
This URL is displayed:
On the sign-in page
Within system and notification emails
You are required to upload three logo files for proper branding across the platform. These ensure your brand displays correctly in different themes and layouts.
Required logos:
Light mode horizontal logo
Dark mode horizontal logo
Dark mode square logo
General requirements:
All logos must have transparent backgrounds.
Preferred formats are SVG or PNG.
Logos should be clean, high-quality, and optimised for UI use.
Detailed sizing, ratios, and examples are covered in the dedicated Logo Requirements guide:
Logo Requirements
A simple guide explaining which logo files to upload for your white-label account, the formats we support, and how each logo is used across light and dark areas of the platform.